The GL.inet range of travel routers is sold with the understanding that we can use them as more than just a router. The idea of being able to interconnect them with everyday items is very appealing. They call this the internet of things. So the curiosity got the better of me and decided to see if we could do the most basic of tasks. Switch a relay module!
Sounds simple, and sure enough, once we did a bit of research, it was. Keep reading to find out the basics of setting up your GL router to trigger a relay module using the built-in GPIO pins. If the config stuff is a bit boring for you, skip directly to the working video below!
Some light reading/research
- http://wiki.openwrt.org/doc/hardware/port.gpio (Understand how OpenWrt and GPIO works)
- You will require a GL.inet router. We used a GL-MiFi and a GL-AR150
- You will also require a 5V relay and some headers/jumpers to connect
- A soldering iron
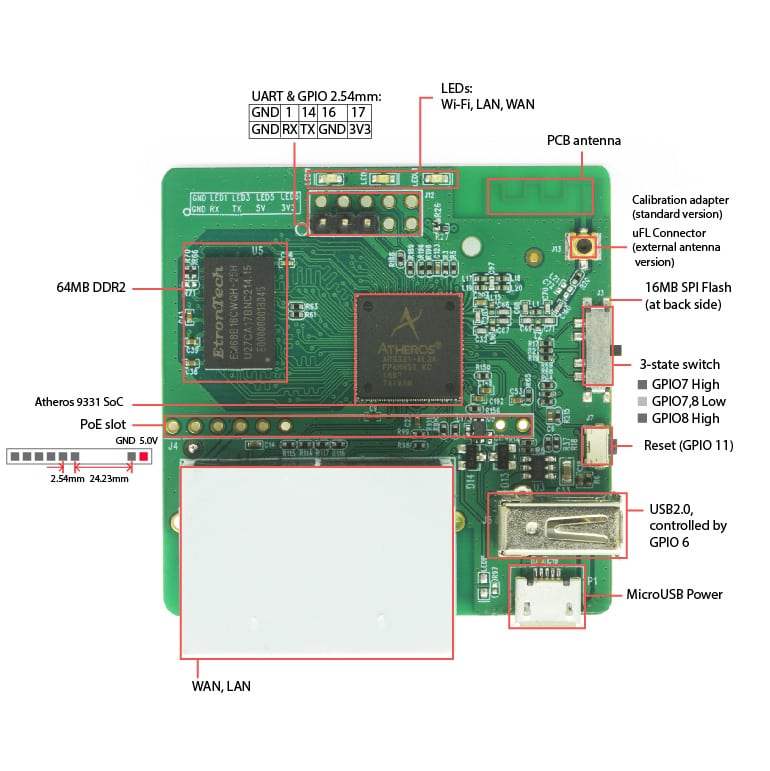
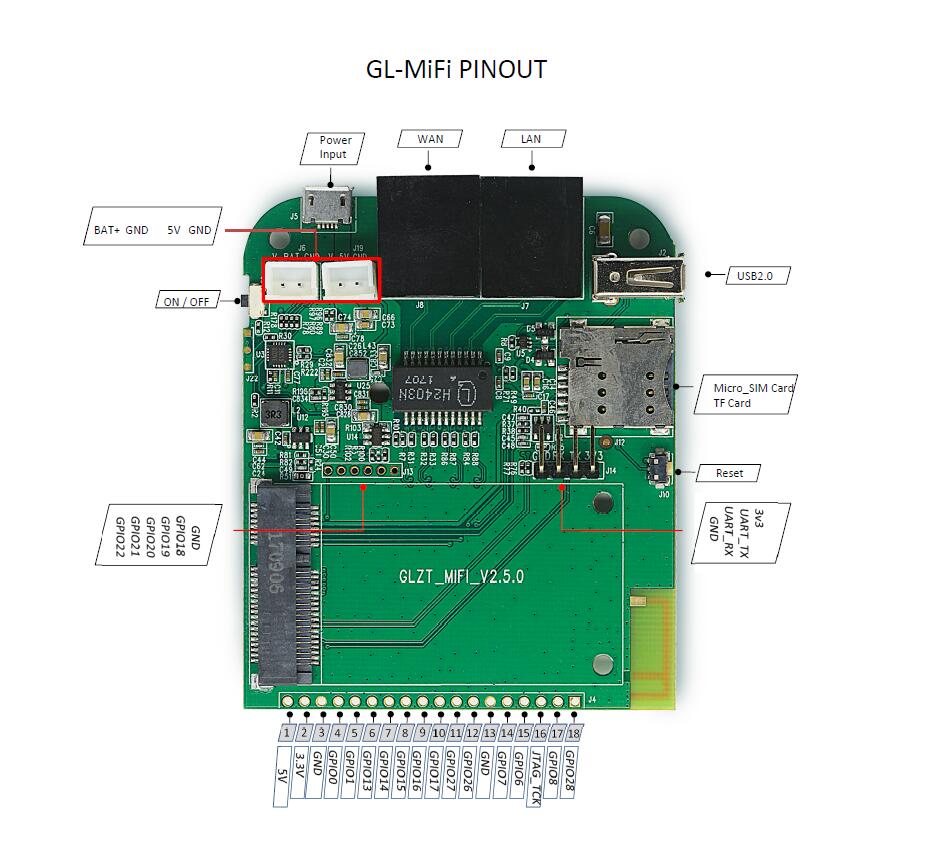
Pinouts (For reference)
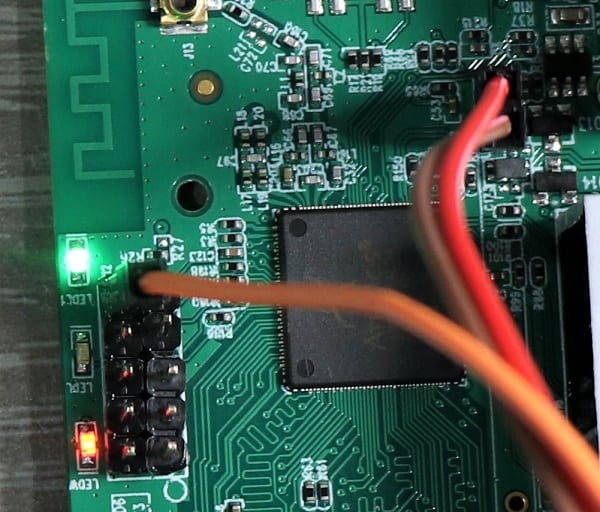
Solder some header pins to your device
First of all, you will need to decide which sort of relay you are going to use and which pins to utilize. I only had 5V relay spare, thus I need to grab 5V from the board and a signal from a GPIO pin. Connect the 5V + and GND up and the signal/GPIO.
The gallery above has the pinouts for the GL-MiFi and the AR-150. Check these to determine the pins you want to use.
Add some config to the router
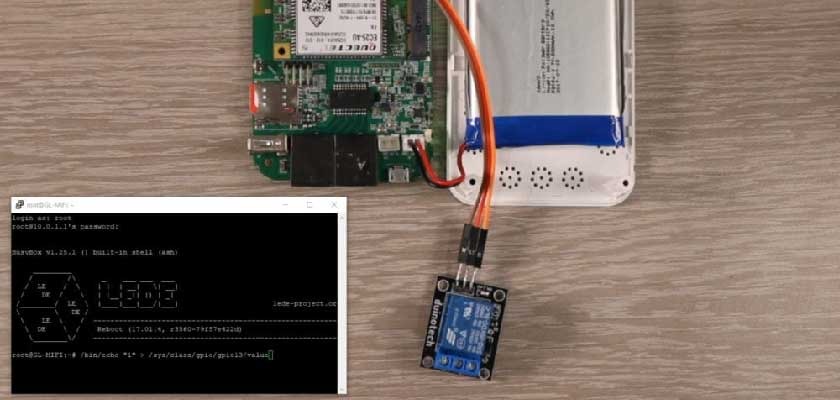
SSH into your router, locate the file: /etc/rc.local Add the config below. Remember to set the pin number to the GPIO you intend to use. This will enable ‘output’ on that particular GPIO. Also, make sure you insert before ‘exit 0′
Shutdown your router. Connect up your relay to the 5V source, and the GPIO you selected in the rc.local config. Power back on your router, SSH back in and run the commands below. ‘1’ will turn the relay on, and ‘0’ should change the state so that it is off.