Would you believe that this whole exercise started after building my home power wall? It seemed like the next logical step in the process. Harvest the sun’s energy, store it in my DIY power wall, then charge an Electric vehicle with said stored energy. Makes sense yea? Well, the power wall has been operational now for over a year and I have only made a little bit of headway into the DIY electric vehicle (EV) game.
Donor Vehicle
 So many choices! But the vehicle had to meet a few criteria. The first being the ‘weight’ of the vehicle. No point choosing a super-heavy vehicle and trying to push that around using an electric motor. The donor needed to be lightweight.
The second criteria were the driveline and gearbox type. I opted for a rear-wheel drive, manual vehicle. By far the easiest conversion is the adaption of an electric motor directly onto the manual gearbox. This may not be the most efficient, however by using the gearbox, flywheel, and clutch we have a manual disconnect from the electric motor, and for me having this safety disconnect is a big selling point in using this method. Push in the clutch and the electric drive is disengaged. Some enthusiasts will say that a direct connection to the input shaft of the gearbox is just as good and will argue that it’s more efficient, however being a DIY build, I feel safety trumps the efficiencies that I may lose.
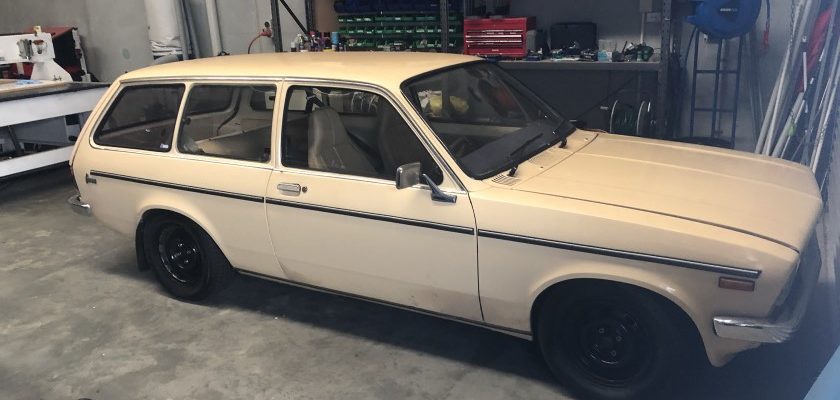
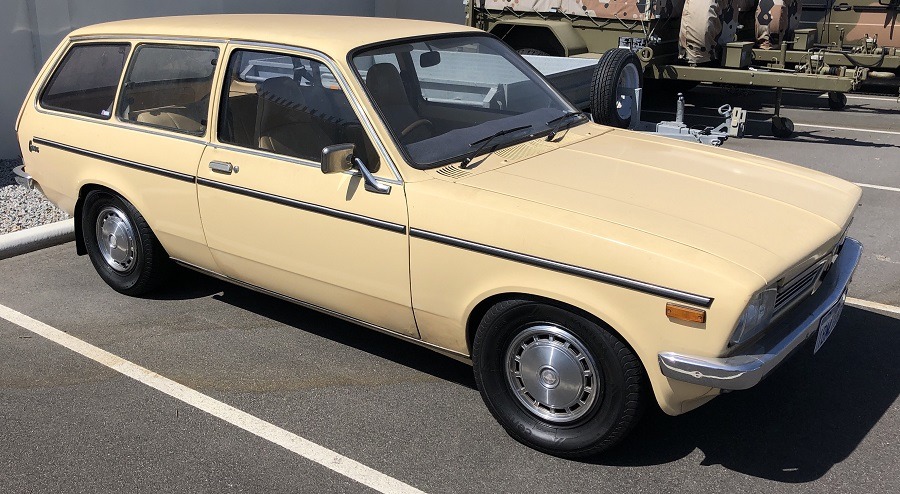
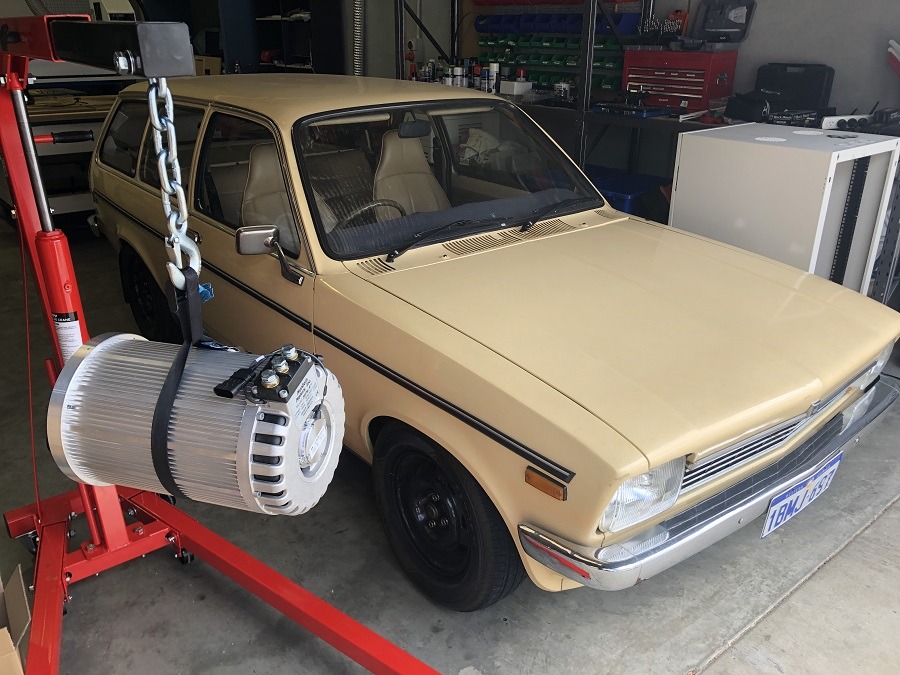
So, what vehicle could we have chosen? A popular choice is the VW Beetle, you can buy kits to bolt up to these straight away. probable convert in a day if you had the right tools. However, I wanted something different. I have always loved the Gemini scene here in Australia, some of the turbo race Geminis go pretty hard. I ended up settling on this little ‘Grandma Spec’ TD Wagon. I chose the wagon as I felt it fit the criteria, heaps of rear space for some batteries and the total weight of the car is around the 900kg mark. Nice and light! It’s also a rear-wheel drive with a manual transmission.
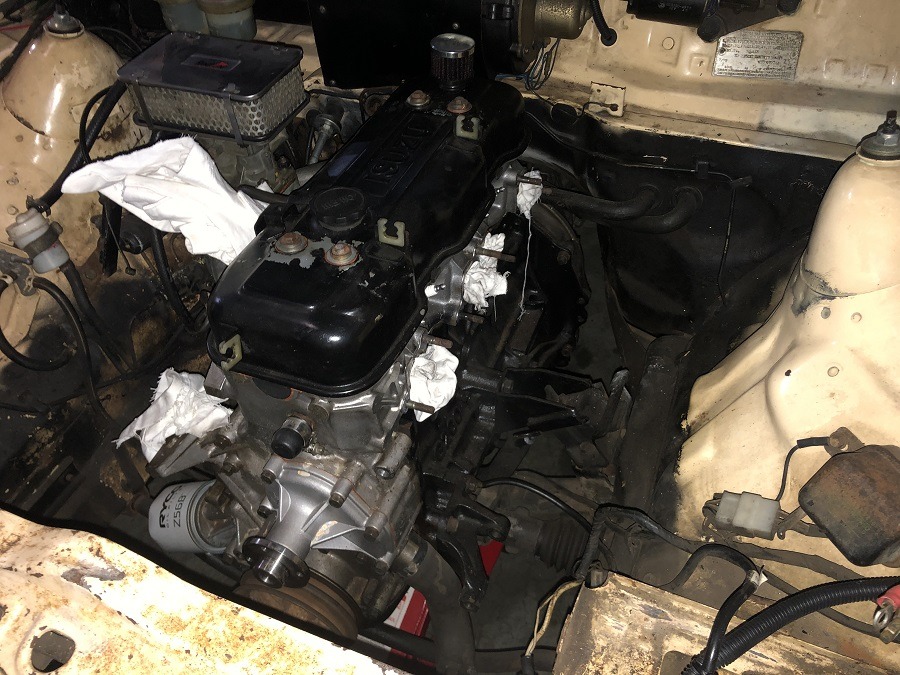
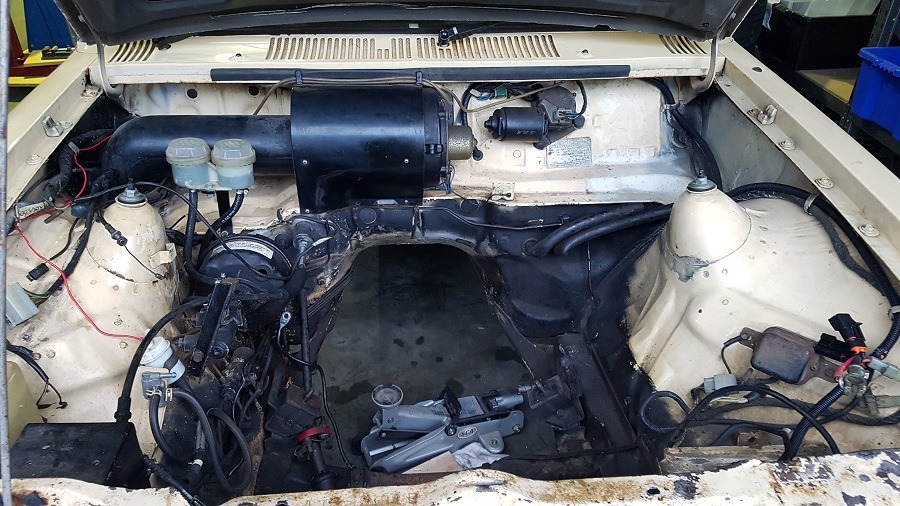
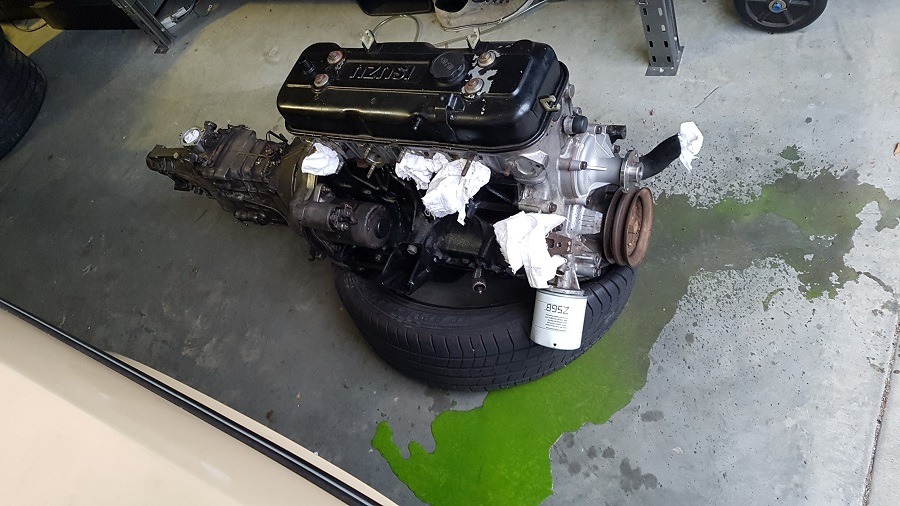
Tear Down
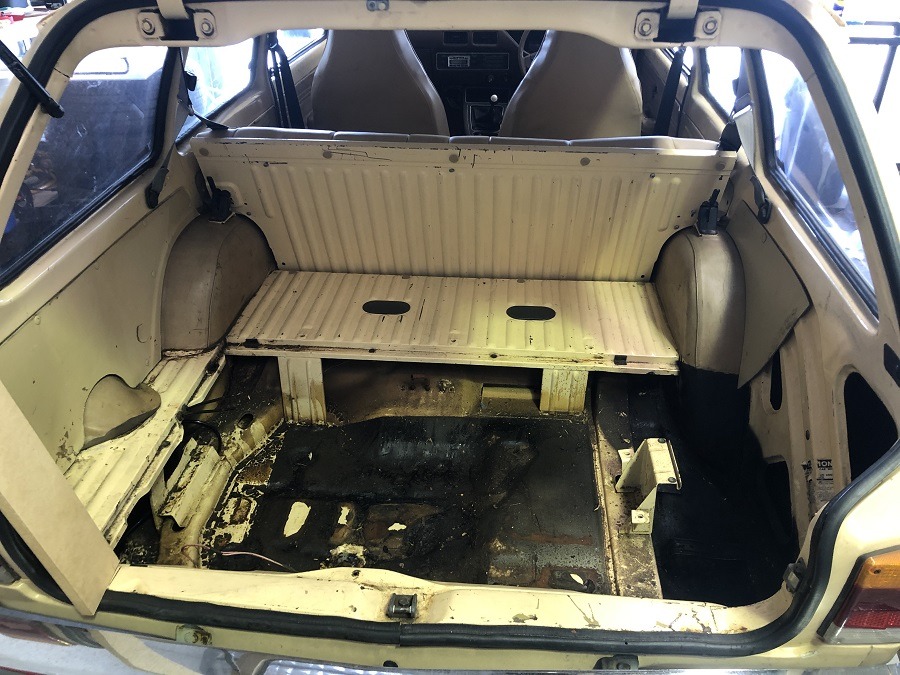
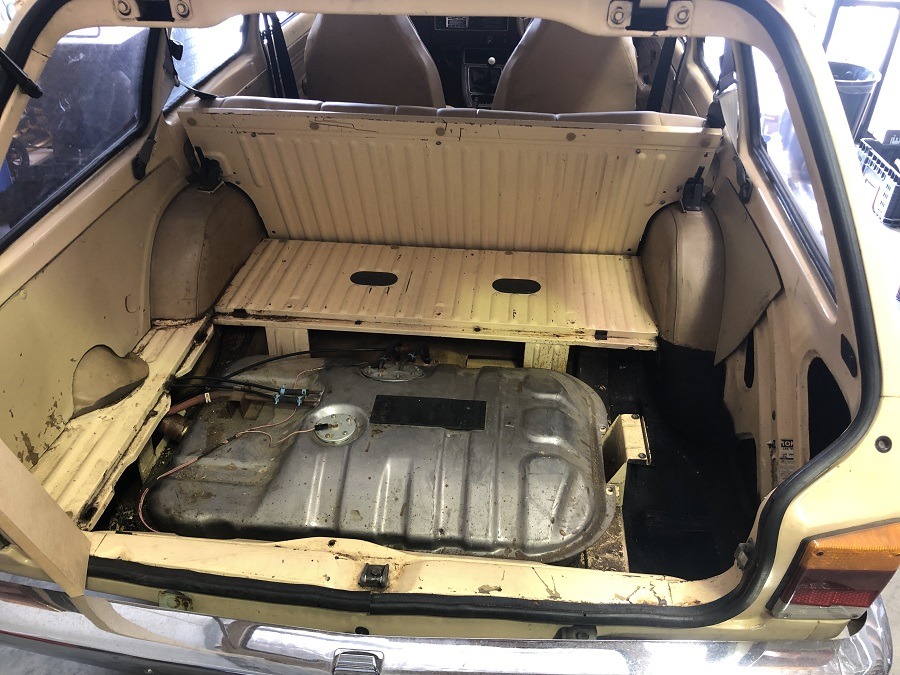
To keep this short and sweet, the teardown was actually the easiest part. Say goodbye to a few of the major offending components. The combustion engine, fuel tank, exhaust, and associated components. For now, I’m keeping the brake system and as many of the stock ancillaries as possible. The idea will be to continue running a 12v battery to run a lot of the original electrics. This will help come during approval/engineering time. Check out the gallery below for a few before and after shots.
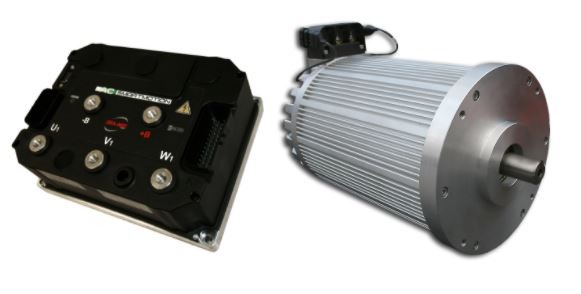
Electric Motor Choice
 I’m no expert on electric motors, but I’ll try and sum up what I have learned and why I ended up choosing the Netgain Hyper 9 motor for my build. First of all, we should chat about the types of electric motors. For Electric Vehicles, you typically will find the following types:
- DC Series Motor
- DC Brushless Motor
- Permanent Magnet Synchronous Motor (PMSM)
- Three Phase AC Induction Motor
- Switched Reluctance Motors (SRM)
Each type of motor has pros and cons depending on how it is used. There are WAY too many factors to discuss in this blog post why one is better than the other. However, we can chat about which vehicles currently have what. The Tesla Model S is probably the best example and runs an AC Induction Motor. We can assume that you get some high performance out if this type of motor. We can also assume that it comes at a cost! You will find DC Brushless motors in electric bikes and skateboards. A bit cheaper, but possibly not as efficient when pushing heavier loads? I’m sure discussions on Motor types will continue as technology advances. What would you have chosen?
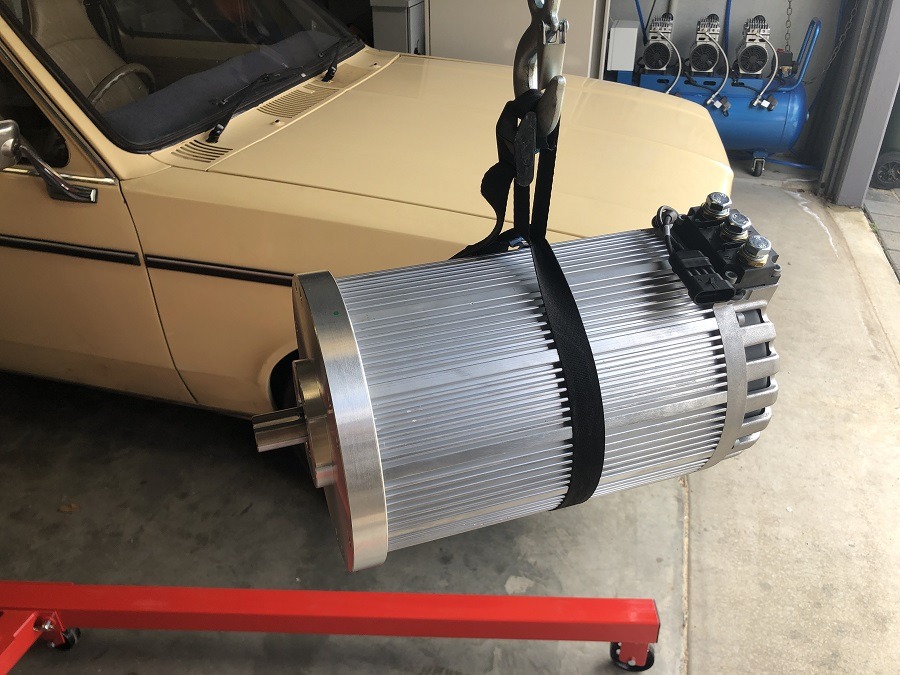
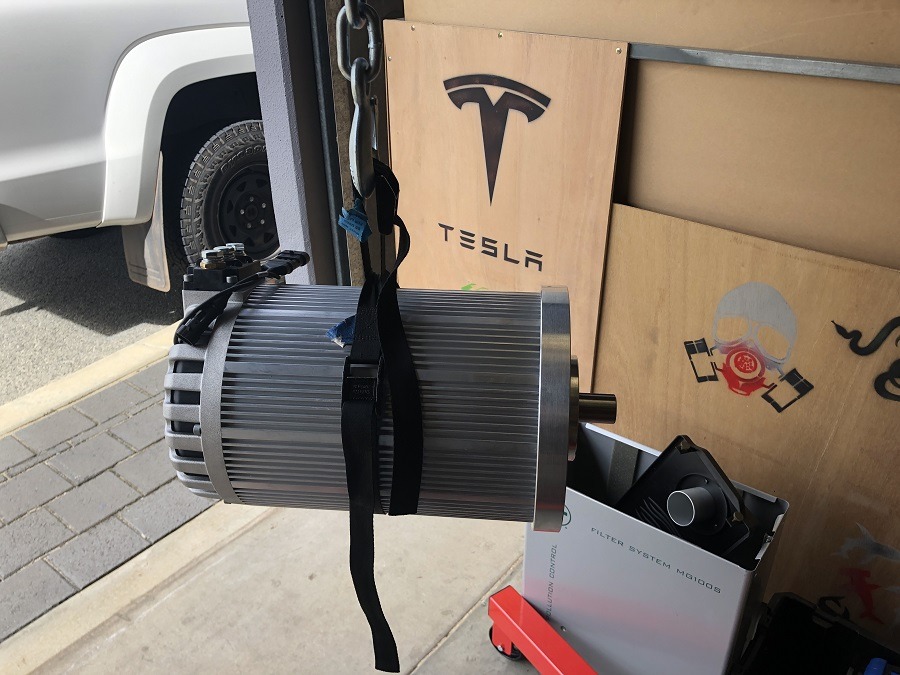
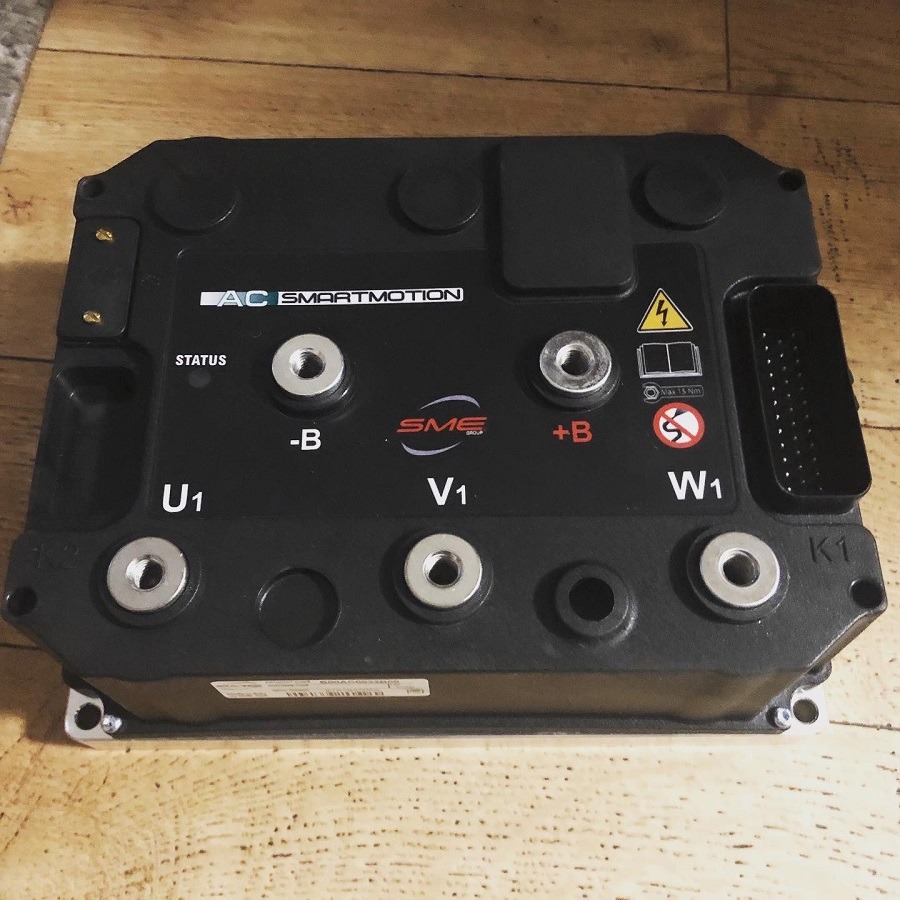
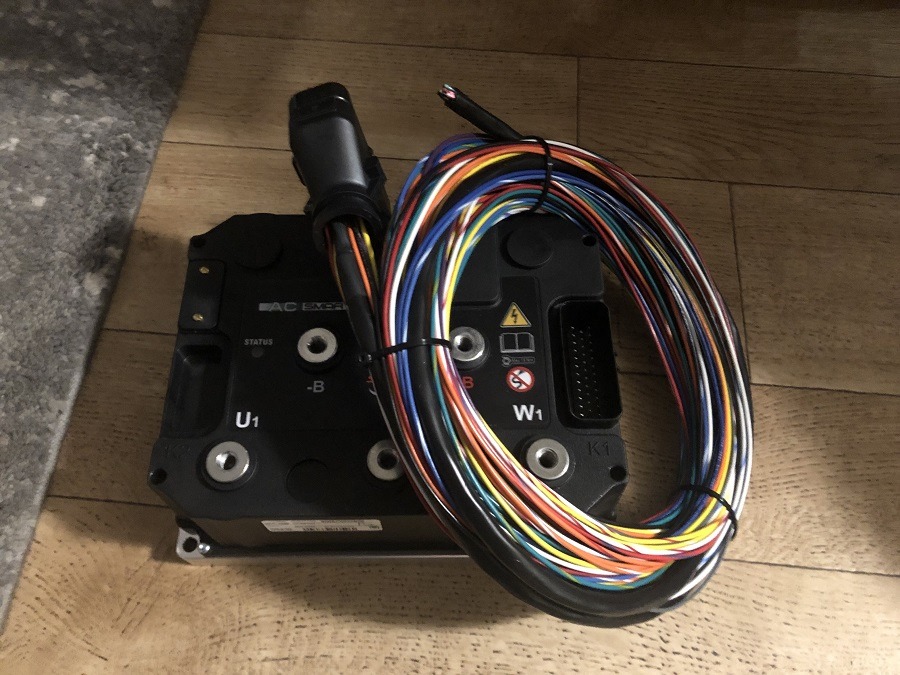
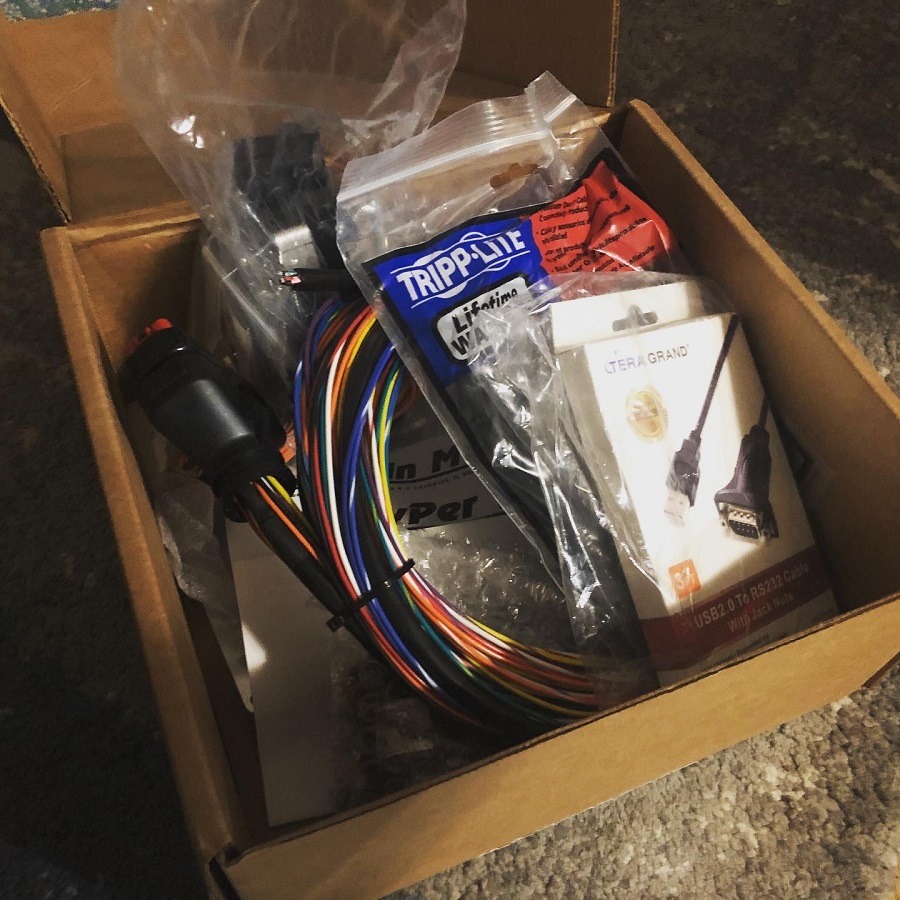
The motor we ended going for was the Netgain Hyper 9. Netgain has penned it as a 3 Phase AC, Synchronous Reluctance Internal Permanent Magnet Motor. The sales pitch is here:
The HyPer 9 Integrated System™ (IS) is the ideal power-train for any light to mid-weight daily driver. Combine multiple systems for heavy-weight and racing vehicles. Its Synchronous Reluctance Internal Permanent Magnet (SRIPM) platform delivers outstanding torque and efficiency, generating higher power per pound than any other motor in its class. The HyPer 9 IS™ includes the 100V brushless HyPer 9™ Motor, HyPer-Drive X1™ Controller/Inverter, SmartView Programming Software, Low Voltage Wire Harness Kit, and Main Contactor. This system has many unique features that set it apart from any other EV solution on the market.
More details and drawings also found here.
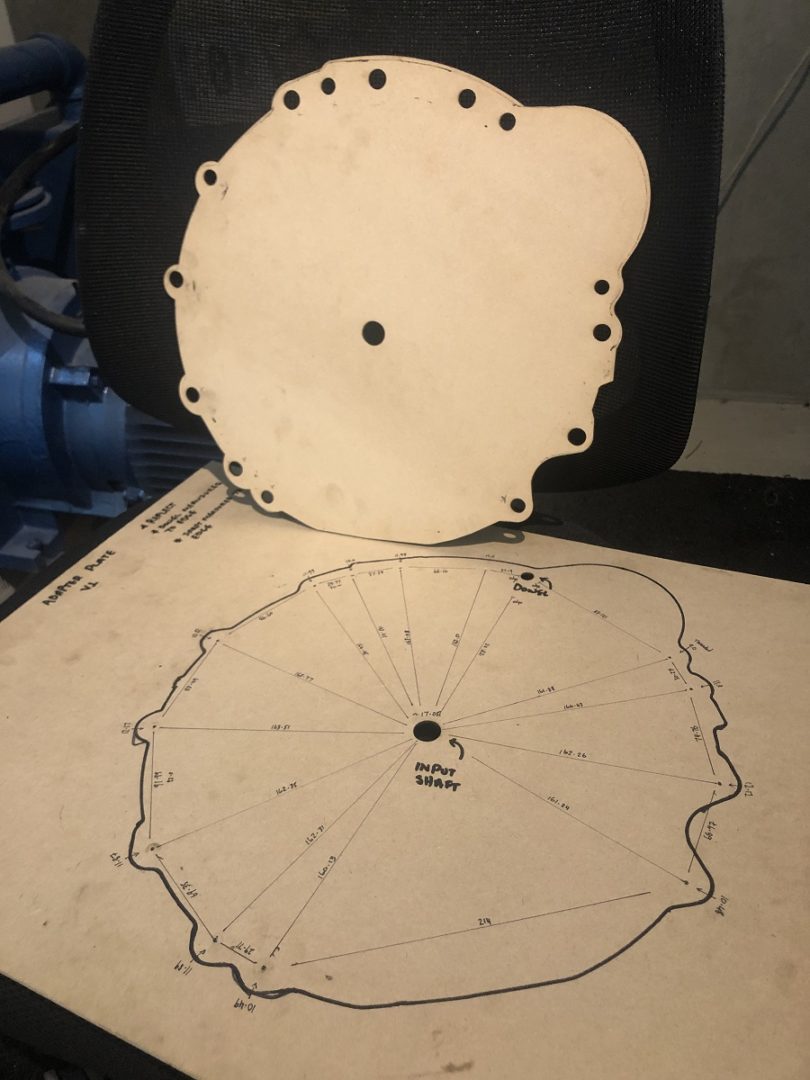
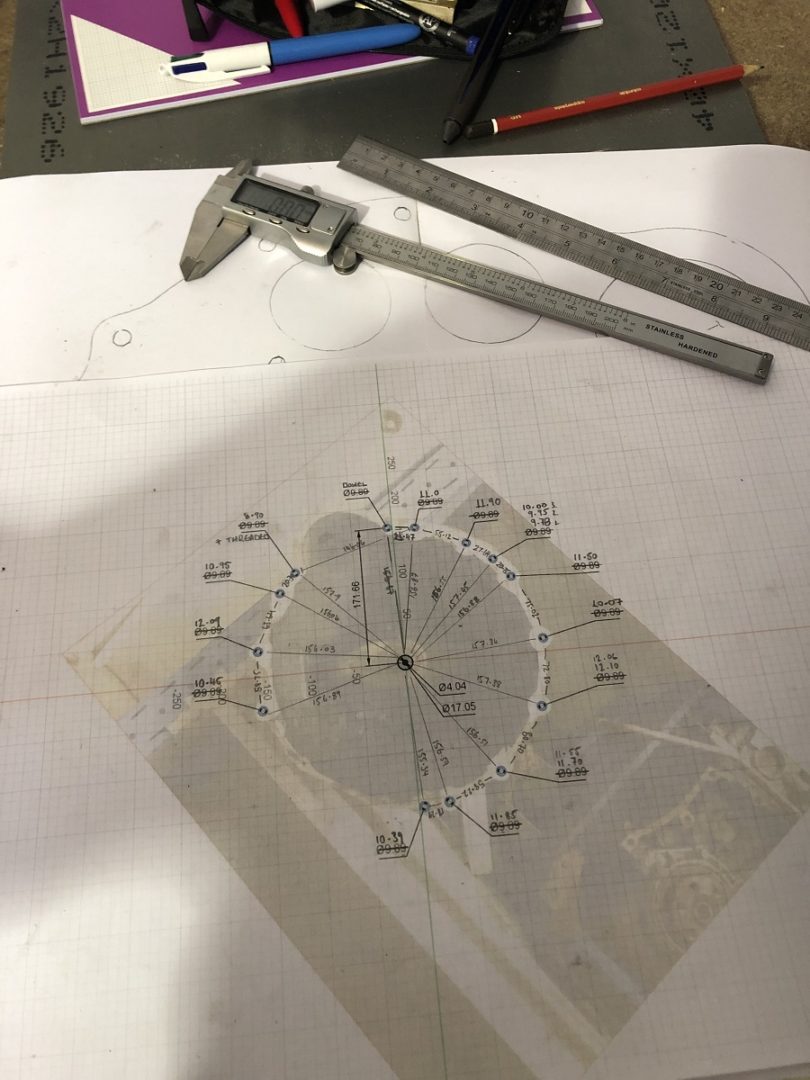
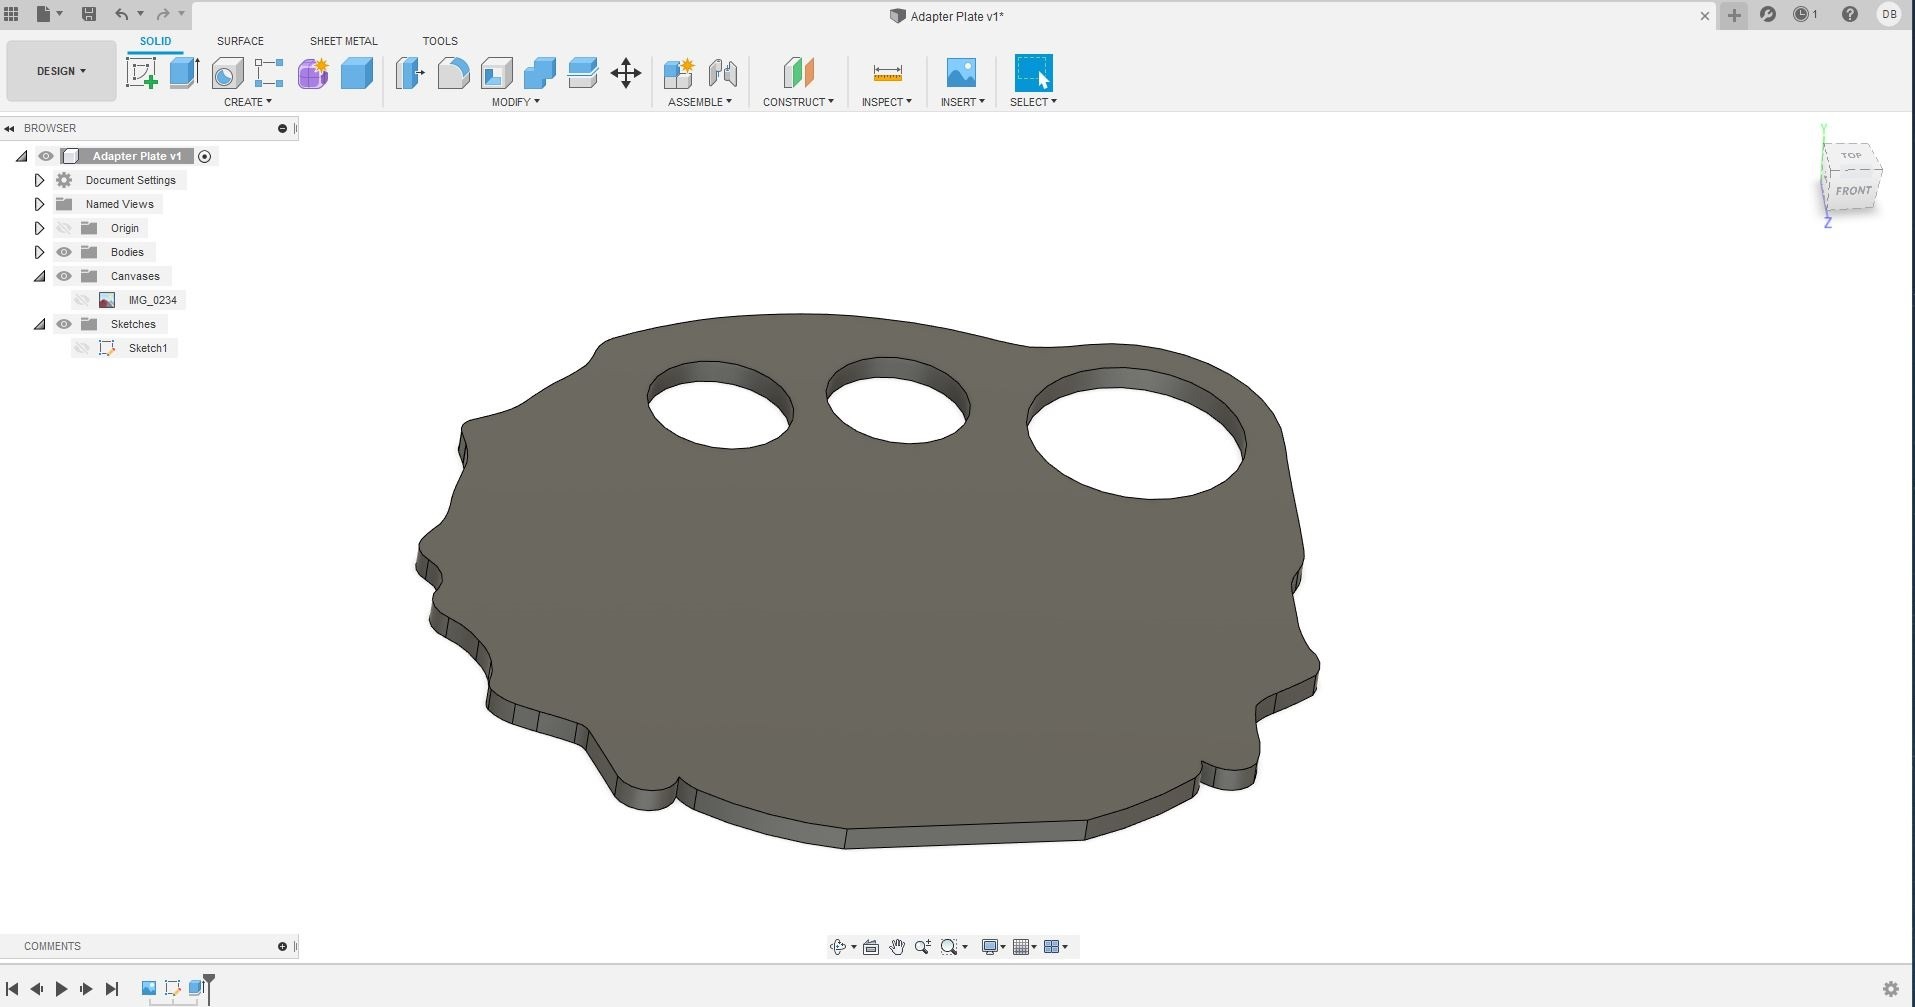
Adapter Plate
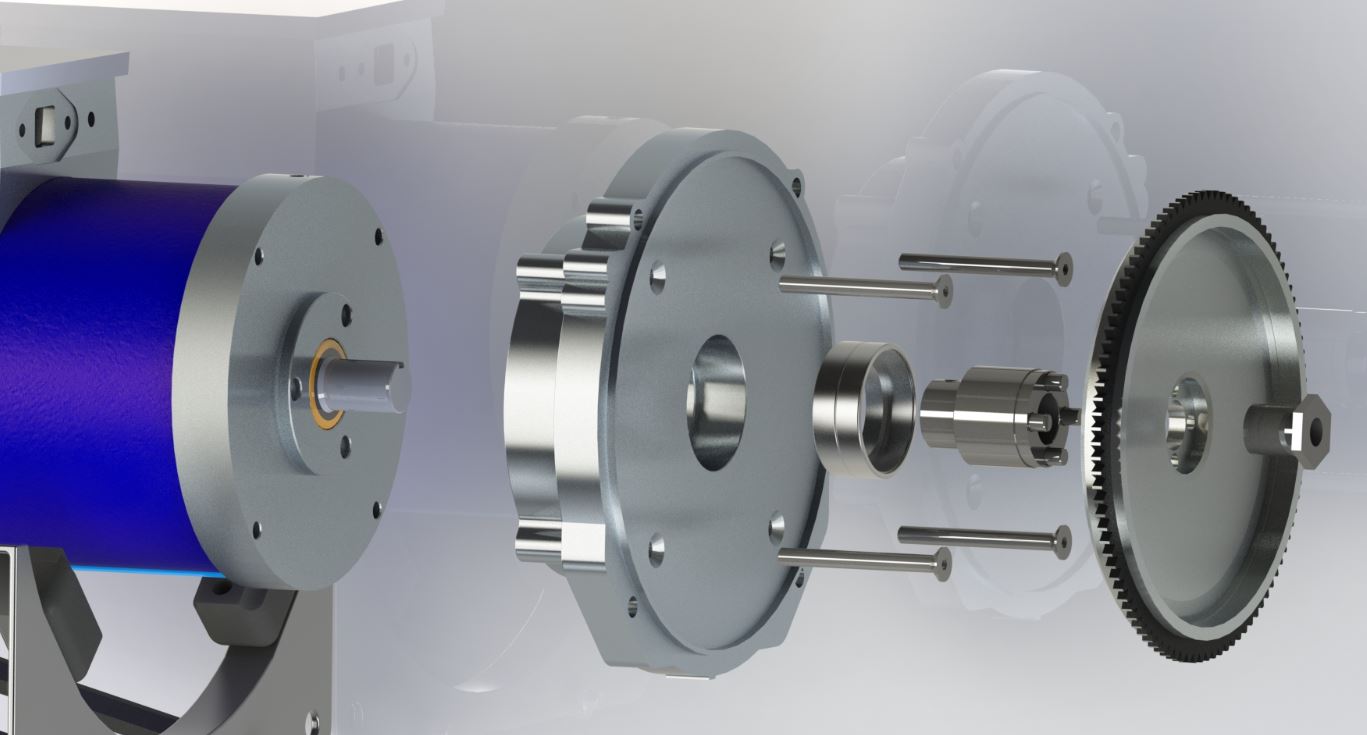 The next item on the agenda is the adapter plate. These plates are pretty common amongst the DIY EV crew. The concept is to use a plate that precisely aligns the new electric motor to the input shaft of the gearbox. If using a flywheel and clutch, then it will align the electric motor both horizontally and vertically to mimic the exact position of the original combustion engine. A coupler is then used to attach the output shaft of the electric motor to the flywheel or input shaft of the transmission. Depending on what method you use. In my case, it’s the coupler onto the flywheel.
As you can see from my measuring attempts, I still have a LOT of work to do on my adapter plate. Check out my progress though. Any advice is much appreciated.
What’s next…
Well, that concludes the first part of this build. It’s going to be a slow process but I promise I’ll keep the blog up to date as I progress. Feel free to comment below. Anything constructive I’ll take on board.
- More Adapter Plate work
- Battery (Save, Source, Setup, and Test)
- Wiring Looms
- Charging Systems (Main Battery, 12v System)
- A whole LOT of stuff I don’t know I need to do…
The cheap* way to go is always sourcing used parts. A Nissan leaf inverter is easy to drive with a $400-900 kit. For RWD applications just open and disable the differential with a spool or plate welding. (Or install it in an AWD, FWD or mid/rear engine vehicle and use CV axles). The reason is salvaged parts are available and cheaply, also it is a proven EV drivetrain. I’m not advertising, so I’ll just say I think the company that sells the kit is the name of an acca dacca song.
Well anyway, use whatever is cheap. You can buy a running good condition Leaf (battery not so hot) for $2,500 USD around here. If all the batteries aren’t dead they can repower a golf cart or power bank.