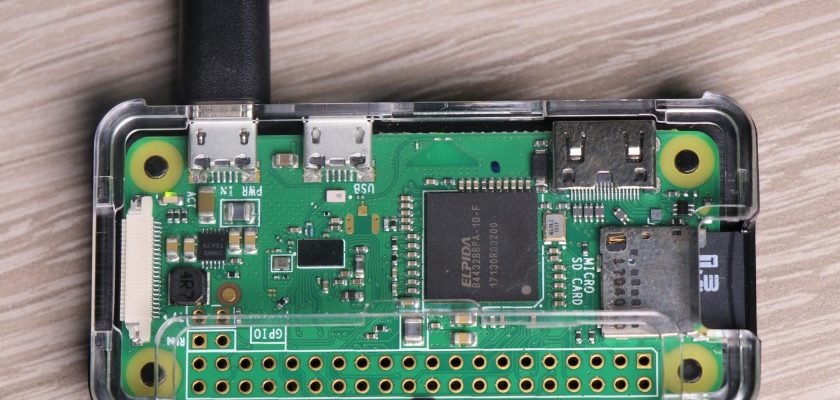
So you purchased a Raspberry Pi ZERO Wireless and like me, did not realise that you would have no way to actually access the small form factor computer, because it does not have any standard USB ports. You actually require an OTG cable to attach any peripherals to the PI ZERO… well, I have a pretty easy fix for you. It involves building the SD card using ETCHER (As seen here.), Adding a config file for the built-in wireless (Assuming you have a PI ZER W) and turning on SSH. If you can achieve this you will then have unobstructed access to your new PI ZERO wireless.
What you need:
- PI ZERO W
- A micro USB cable for power
- 2.1A Power supply
- PUTTY (For SSH) – https://putty.org/
- Angry IP Scanner – http://angryip.org/download/
- Text Editor (NotePad++ or equivalent) – https://notepad-plus-plus.org/download/
- Raspbian Image – https://www.raspberrypi.org/downloads/raspbian/
Step 1. Setup the SD card and download your image.
Download Raspbian Stretch Lite and use Etcher to get the image on your SD card. Grab your copy of Raspbian from here. The prerequisite steps here will walk you through Etcher. We will run the ‘Lite’ version on the PI ZERO because it does not have the processing power of the RPI3. Also, there is no point loading the GUI if we do not intend to use it for that purpose.
Note: Once etcher is complete, you may need to unplug/plug your SD card back in. Etcher may unmount the drive for you when it is finished. Also if windows spit up some errors asking to format the drive. Do not do it!
Step 2. Add two files to the PI ZERO SD card to allow wifi and ssh to connect on power-up
 The first thing we need to do is create two files in the root of the SD card. When you plug the SD card back into your computer, look for the drive called “boot”. You need to create two files. Once called ‘ssh’ and another called ‘wpa_supplicant.conf’ Please note that the file called ‘ssh’ has no file extension, and wpa_supplicant.conf has a file extension of ‘.conf’
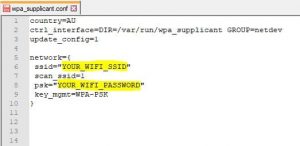 The ‘ssh’ file can remain blank, we do not need to add any config to it. This will simply enable SSH on the PI ZERO. However the ‘wpa_supplicant.conf’ file will require us to copy and paste this config onto it.
Step 3. Put the SD card into your Pi ZERO and power it up
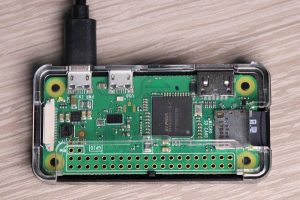 Put the SD card into the PI ZERO and power up the RPi. It will take approx 30sec to a minute for it to power up, get wifi connectivity, grab a DHCP address from your router and enable the SSH service. The problem we have now, however, is that we do not know the IP address of the PI ZERO for us to SSH into.
To find the IP address of the PI ZERO, we are now going to use ‘ANGRY IP’ Scanner on our local computer. You can see a run-down of how to find your RPI IP address here also.
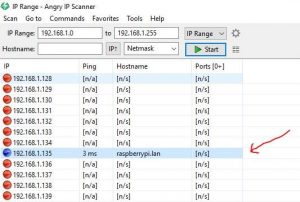 If you don’t want to check out the link above. Then Go download angry IP and run it up. It is pretty easy to use and will ping every active device on your network to tell you if it is UP or DOWN. The hardest part is identifying the correct Pi on the network. If you are like me, you may have more than one.
Step 4. Now that we know the IP address of our Pi ZERO, let us try SSH into it.
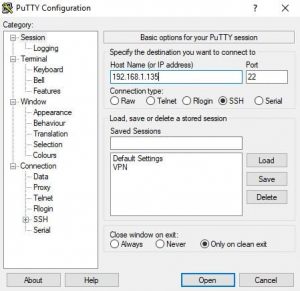 Open up ‘Putty’ and enter the IP address into the required field. Make sure the SSH radio button is selected. Generally, port 22 is suitable for SSH. (This is the default port.) Then click ‘Open’ at the bottom.
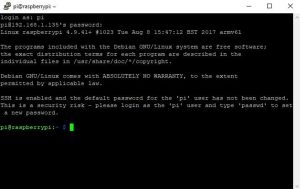 So long as the PI ZERO has wifi connectivity you should now be able to SSH into your PI. I would now start to update the build/packages and also look at changing the hostname so that it can be identified easier on the network.

new texts were rewritten