Why has the blog been so quiet I hear you ask? Well, I started work on a DIY Powerwall from recycled laptop batteries. Yes, you heard correctly, I have started building a Tesla style power-wall from 18650 batteries. These are commonly found in Laptop battery packs. A why would I do such a thing, I hear you ask? In a nutshell, I want to save on electricity bills by using Solar a bit smarter and storing the energy for later use. I also wanted to see if it was possible to build a reliable/equivalent power-wall at a fraction of the cost of a Tesla style power-wall.
After a small bit of research, I stumbled across two resources that have become staples in my DIY Powerwall diet. Those are the Second Life Storage forum and the HBpowerwall Youtube channel, run by Peter Matthews. Using these two resources you can find out just about everything you need to know about building your own power-wall. Check out the links. Also, check out my journey below.
First Steps – Find Laptop Packs, Pull them apart…
 Some of the DIY’ers find this step one of the most difficult. Finding laptop battery packs to recycle the 18650 cells can be tricky. I approached a few battery stores and computer stores but most seemed disinterested in selling me the old packs. I am not sure if it’s a health and safety thing, or they get more recycling them. However, after finding the right people through a few Facebook groups I was able to get a steady supply of laptop batteries through an IT recycler. At first, I purchased 20Kgs of batteries not knowing what I would get. But then went on to purchase 30kgs, 40kg and most recently 60kgs. The break-down of how many usable cells I actually got from these old laptop batteries is below.
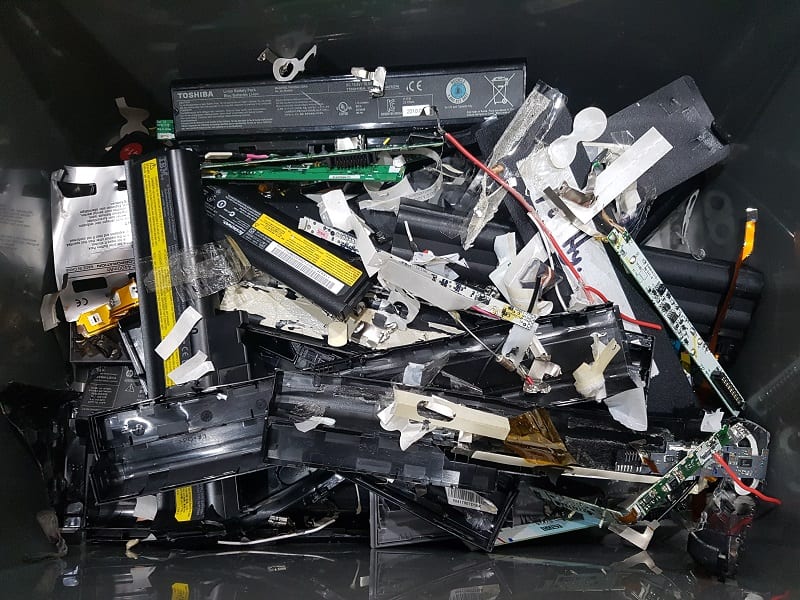
 Everyone has their own method for pulling apart the laptop packs, however, I will say that safety is paramount here. The last thing you want to do is slice yourself open on the nickel strip or even worse short/explode a cell or two. (Saying that, it’s pretty hard to do this unless you’re super careless.)
I would suggest purchasing the following items:
- Vice Grips
- Sharp Small Side Cutters
- Gloves
- Eye protection
 The end state of pulling the laptop batteries apart is to get the singular 18650 batteries out. Once we have them out and ready to go we can begin to analyze them to see if they are suitable for our power wall. Noting that these batteries did come from old laptop batteries we really do not know what state they are in, we must ‘process’ the cells to determine the capacity of every cell. Also, try and detect the bad from the good cells.
Step two – process a heap of cells
 Once you have started your journey to building a DIY power wall, you will no doubt need to process bulk cells to weed out the good from the bad. There are many ways to achieve this outcome, however, I will give you a rundown on how I am doing it. (And a basic guide to the budget required for processing.) This part is easily the most tedious part of the build. For example, if you decide you would like a 48v 10-12kwh power wall then you are looking at requiring 1400 cells at a minimum. 1400 may not sound like many, however, after weeding out the bad cells, you soon find that it does take time.
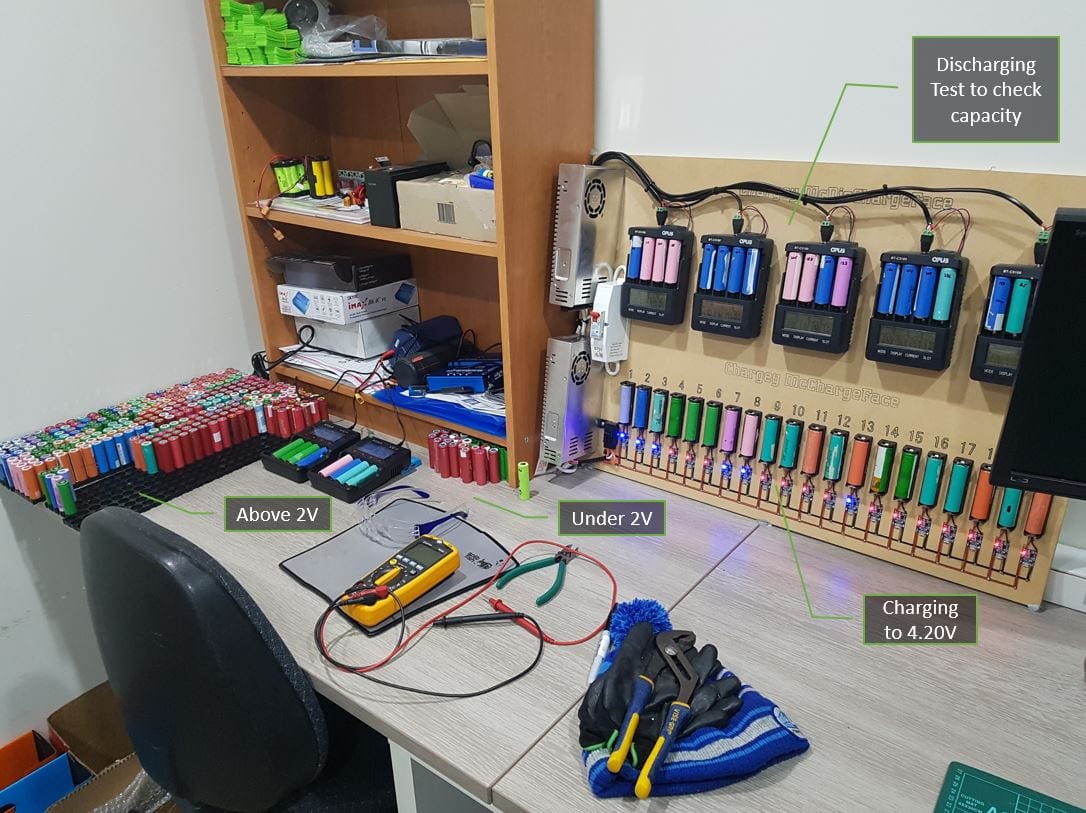 The process that I follow to process cells is as follows. First I will check the voltage of each cell. If a cell pulled directly from a laptop pack is at 2V then it will go into the pile to be charged/discharged via the charging wall. If the cell is below two volts then I will put the cell into another pile which will require a specific charger to get them back to health (If they can be revived?)
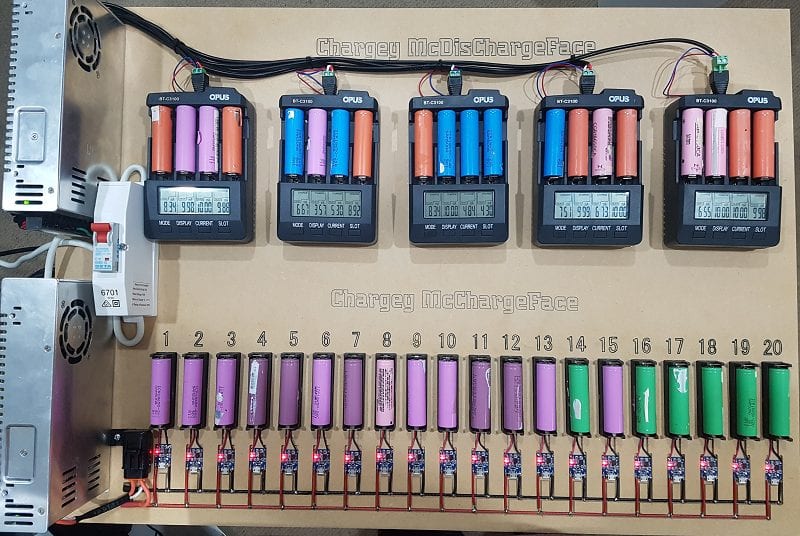
For the cells that pass the 2 volt test, they will then be placed into the cell holders attached to the TP-4056 chargers. These small lithium specific chargers are very cheap and an ideal way to bring any old batteries up to full charge. You can pick these up from eBay very cheap in packs of 10-20. I went with 20.
Once the cells are charged to maximum voltage, the cells are then cycled into the Opus chargers for a discharge test. This is will give us the remaining capacity of the cells. Basically, it ensures that the cell is at 4.20v, discharges the battery to 3 volt, records the capacity in milliampere-hours (mAh), then charges the battery back up to 4.20v ready for the next test.
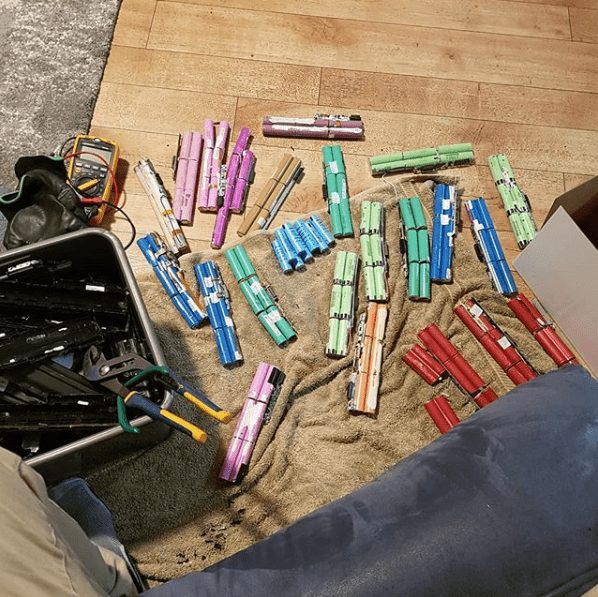
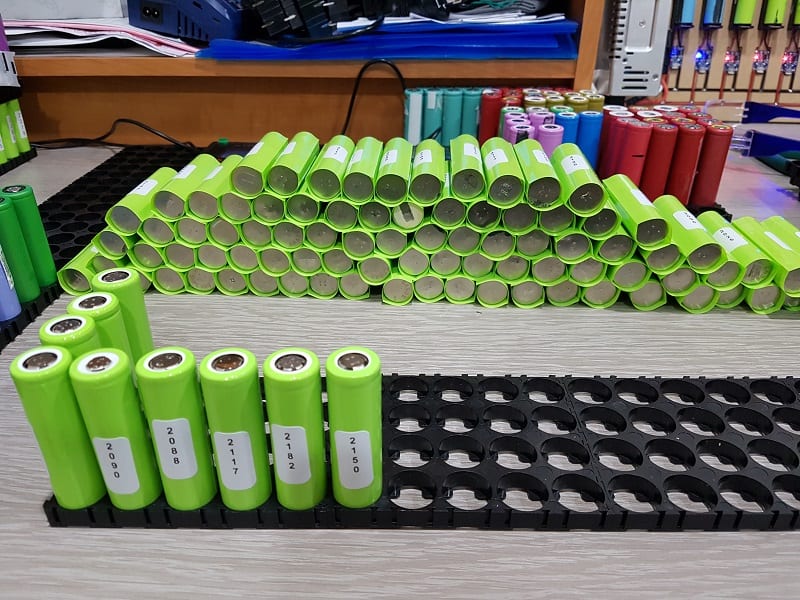
 Once we know the remaining capacity of a cell, we then write it on the side of the cell for future reference and we also notate the current-voltage of the cell at the time. The cells are then placed into tubs grouped by capacity and left to sit for a minimum of one week. The reason for this is that we want to identify any cells that can not hold their voltage. These are known as ‘Self Dischargers’ we do not want a cell in our packs that cannot hold a charge/voltage. This can have significant effects on our packs once built.
Step three – prepare processed cells for packs
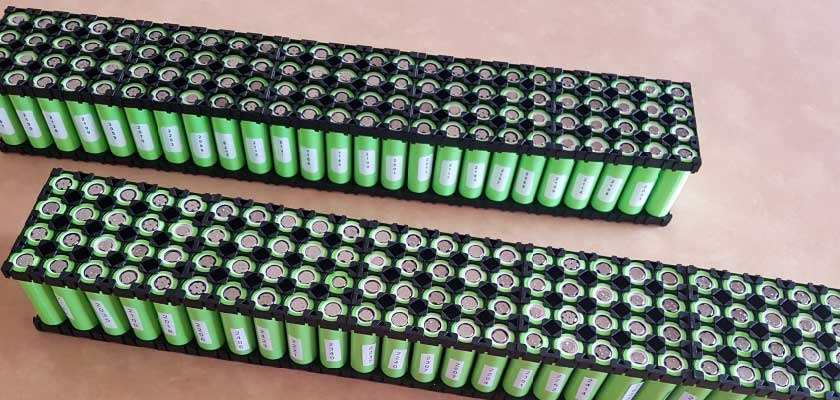
 It will depend on a lot of factors on how you will proceed with building your packs. Each choice will have pros and cons. Go with the method that best suits your cell count and abilities. At present, I have not 100% decided on the method I am going to use, however, I am re-wrapping the vast majority of my cells first. Once I have 1400 quality cells, I will then arrange them into 14 packs of 100 cells. (14S100P) This will give me a 48v nominal power-wall around the 10-12kWh.
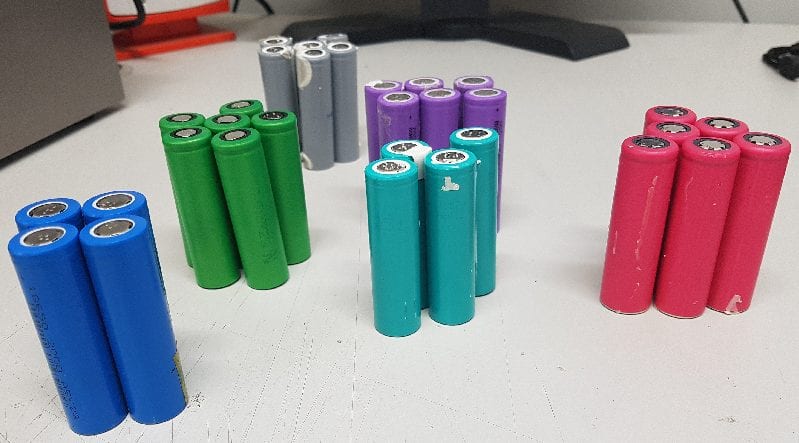
 So where am I at right now? Well, I have processed approximately 60Kgs of recycled laptop batteries. I set my limits for the cells to go into my wall at 2000mAh. I currently have 4 packs with 100 cells in each pack. If I lower my standards to 1800mAh I could probably have a 5th pack built, but for now, I plan to stick to the magic 2000mAh for my wall.
- Cell pack builds (Once I decide which method to use)
- Some tips and tricks for better pack build.
- Solar/Inverter installation and connection to battery packs.
- cost/cell breakdown
- Anything else I can think of that may be relevant! (Let me know in the comments what you want to know?!)
What to skip forward in the series? check out the other parts of the build!
Part 2 – Building Packs
Part 3 – Fusing and cell protection
Part 4 – Solar/Inverter Install and BMS
Part 5 – Thats a wrap….Kinda
How i can get cells to make my diypowerwall
Hi Antonio, you could try a few places. Start with any IT recyclers, after this you could try to approach some IT repair companies. Usually, they only have small volumes though. After that, you can purchase new ones. Also, check out the many 18650 Facebook groups. Usually, they have a few going. Good luck!
power2spare.net
batteryclearinghouse.com
batteryhookup.com
jag35.com
Hi Dwayne,
thank you very much for your great article and your great work.
You write about “self dischargers”: What is the critical voltage where you decide if you have a self discharger or not? Do you let the cells rest for a few hours after charging to 4.20V and do a first measurement which you compare with the result of the measurement after a week?
BR,
AK
Thank you very much.
Hey AK, I let the cells sit for weeks before retesting them. Generally, I aim for at least a month of resting before checking voltage again. After that, I did not put anything in my wall that had fallen below 4.14. After testing a few thousand I did notice that some brands of batteries just do not like sitting up around that 4.20 mark for long. Plus I don’t really trust the opus chargers to put them up to 4.20 properly. 4.10 – 4.15 seems reasonable to me to keep.
Salve io sto cercando batterie dei computer portatili qui in Italia è diventato un po raro trovarne in grosse quantità mi può consigliare dove poter trovarne fuori l’Italia grazie
Hi Elvezio, I approached IT recyclers to get most of my batteries. It took a while to find them. Also join a few facebook groups. Look up ‘DIY Powerwall’ on Facebook and see what you can find. Good luck!
What size power supplies are you using on your charging/discharging station?
Hi Simon, I used two Meanwell Power supplies. From Memory, one is a 5v 55a version for the TP charging modules. (Overkill!) and the other was 12v 25a for the Opus Chargers. Again, probably do not need that much, but I had them laying about.
Im New on this and like to know best place to buy 18650 battery holder.
Ali Express my man!