Finally some time for an UPDATE! The short story, I finally processed enough 18650 cells to start the build. For the long story, keep reading and check out the video. In this post, I am going to walk through some of the bits and pieces I have had to gather and sort out prior to starting the cabinet install. More often than not when undertaking a project like this, we never think about all the small details which must be taken care of prior to a build being completed. This is no different. As we know, lithium batteries, if not treated correctly, can be somewhat volatile, thus, some extra safety precautions need to be taken before bringing the batter online.
The Shed – No chance am I putting this build inside the house!
 Having a suitable location for your power wall is probably one of the largest considerations of the whole build. As mentioned earlier, if lithium batteries are not treated correctly it could end up in a molten mess and no matter how many fire extinguishers you have, the lithium battery fire will consume everything in its path. If you do not believe me, check out some of the videos on youtube! My build takes us out to the shed of course. The shed is not far enough away from my house for my liking, but have to work with what I have. I was able to pick up this nice B&R electrical cabinet for $150. These cabinets are very sturdy and made of steel. The orange powder coasting was not by choice, but for the price, who am I to complain. The cabinet is large enough to fit my first 14S100P setup, with room to double it at a later date. (Top and Bottom) I am also looking to get some airflow top to bottom in the cabinet at some stage.
 I went ahead and mounted some structural pine to the wall. My plan is to now use some slotted C-Channel to mount the inverter and components to the wall. This will allow me to conceal some of the cabling, whilst maintaining the structural integrity of the ply and wall. I’m yet to decide if I should paint the ply?.see what happens. I also need to look at cable management, and how/where to mount all the other associated equipment.
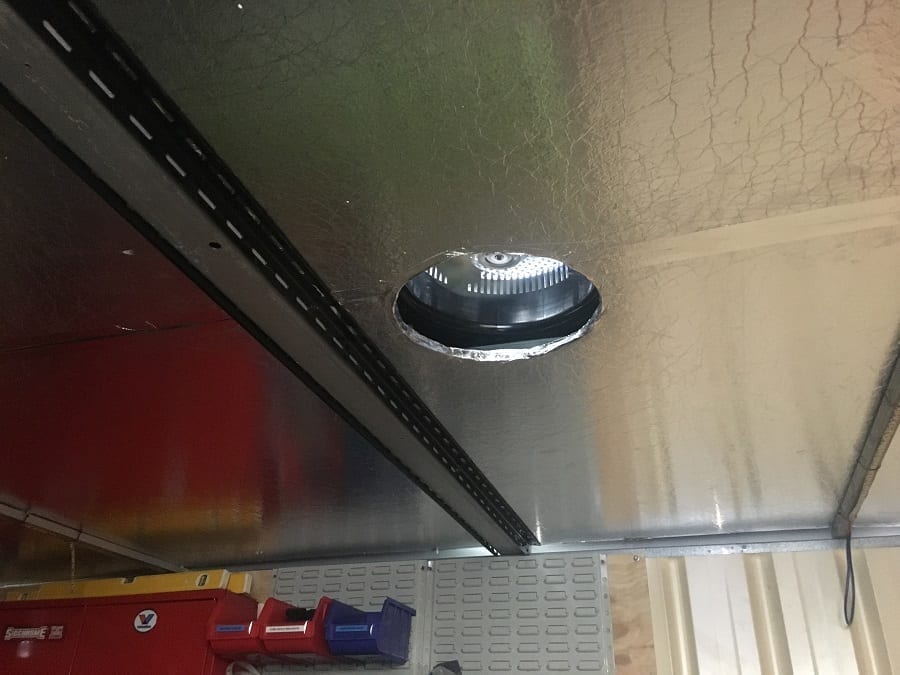 Insulation?? As we are working from a common garden shed, I had to insulate the roof of the shed. It was getting WAY too hot inside to house all these components. I ended up purchasing some foam foilboard from the local hardware store and mounted a small 200mm solar vent. It seems to keep the temperature steady. Even on 40deg C days, it seems ok inside. I do plan to hook up some temp sensors into the future. Also some more ventilation. Bring in the cool air from the bottom, vent out the top.
Sorting and Stacking Packs
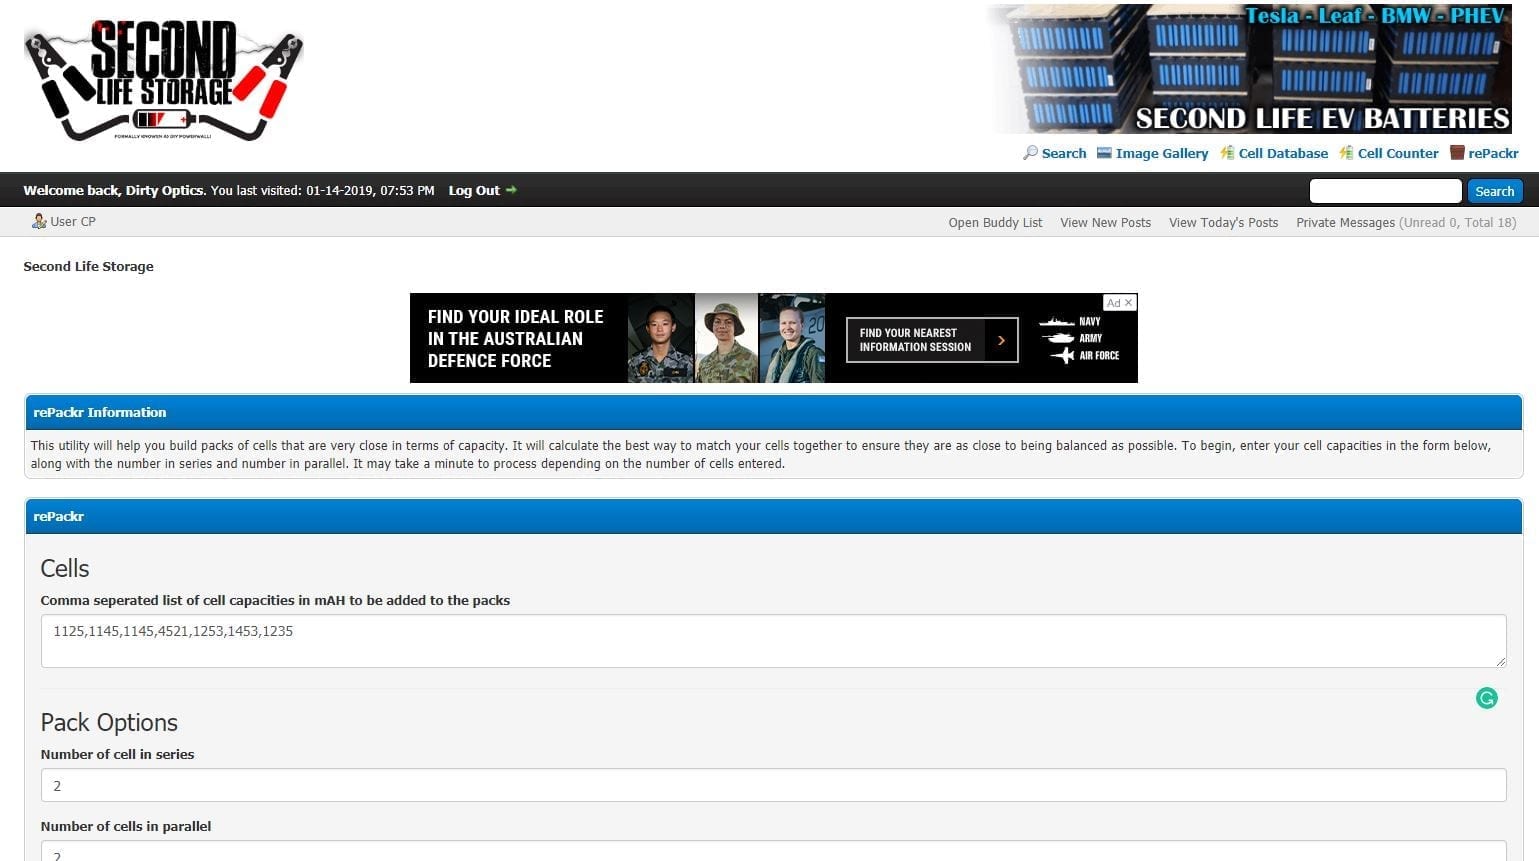 From what I have read, sorting your cells into equal packs can be crucial to the whole setup. The aim is to have the same (or very similar) capacity in each pack. But how do we do that? well, there are a couple of methods. The first and possibly most accurate is using some online software called ‘rePackr’ which is located here. With this tool, the idea is you enter in the capacity of every single 18650 you have and it tells you which pack to put them in. Pretty much sorts them out so that each pack is as close to the same as possible. The downside is that you need to type in or cut and paste in the value of every cell. When your wall contains over 1400 batteries this can become a PITA.
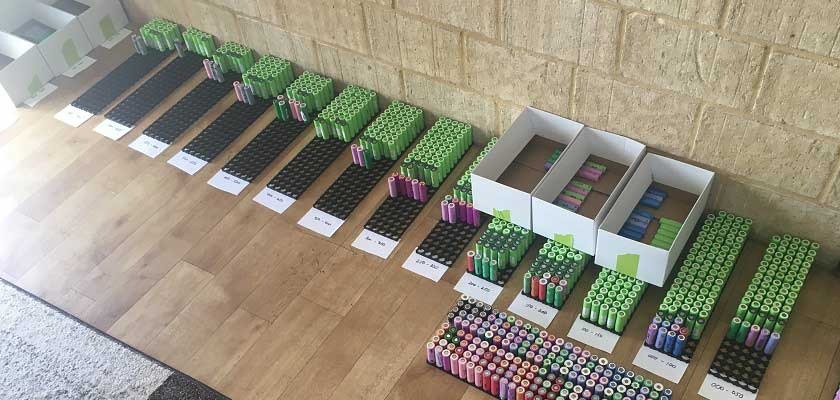
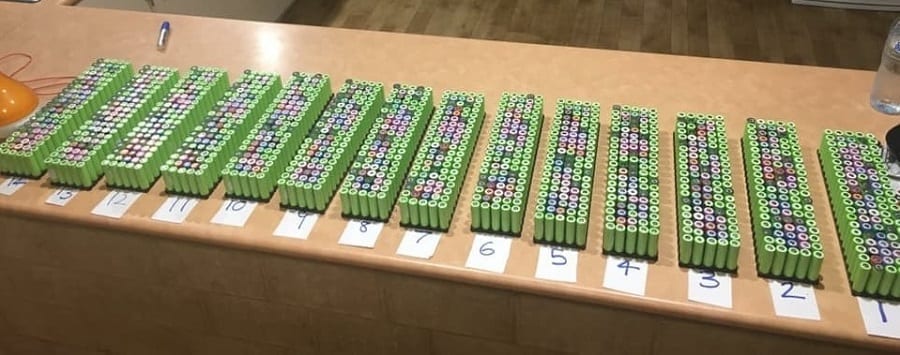
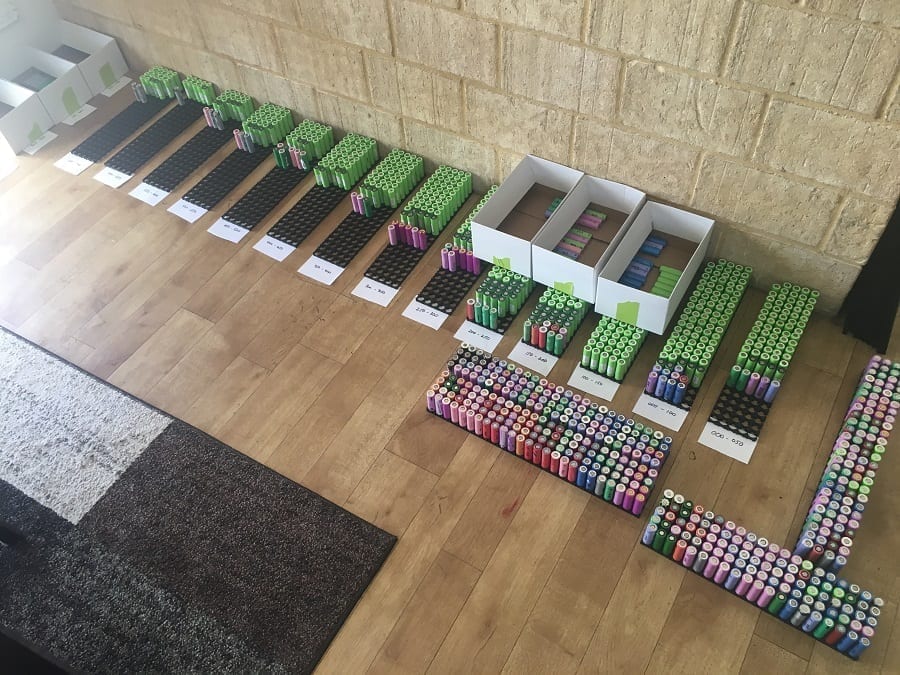 The method I chose to use was a bit more archaic but has been proven to get the job done. I sorted all the batteries out into groups of 50mAh. For example, the cells that are at a capacity of 2050mAh to 2100mAh would all be grouped together. I did this across the whole range of my cells. I think I ended up with 20 groups of cells. From here it was then pretty easy to take one from each group and fill the packs so that they were somewhat evenly mixed. The proof will be in the pack testing. Only then will I know how close I got.
 Once we know the remaining capacity of a cell, we then write it on the side of the cell for future reference and we also notate the current-voltage of the cell at the time. The cells are then placed into tubs grouped by capacity and left to sit for a minimum of one week. The reason for this is that we want to identify any cells that can not hold their voltage. These are known as ‘Self Dischargers’ we do not want a cell in our packs that cannot hold a charge/voltage. This can have significant effects on our packs once built.
Battery Management and Safety
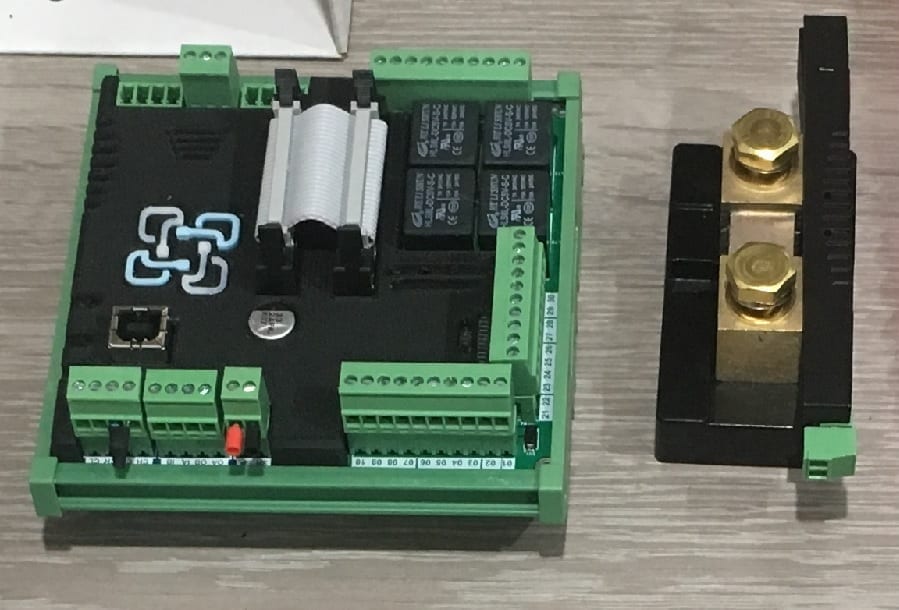 ok, so we have our packs now and we need a few additional bits of hardware to make sure out battery packs are as safe as we can make them. The first item used is a Battery Management System (BMS). The BMS we chose was the Batrium Watchmon setup. This seems to be the go-to BMS for DIY type powerwalls at the moment. They seem to be doing a fair bit of development on the hardware and software which is always good. If you want to check out more of their items head over to the website here. In a nutshell, the Batrium BMS controls the charge states and the balancing of the packs. It is important to control this as we do not want to over/under charge the batteries and we also want each pack to drain and recharge in a balanced fashion.
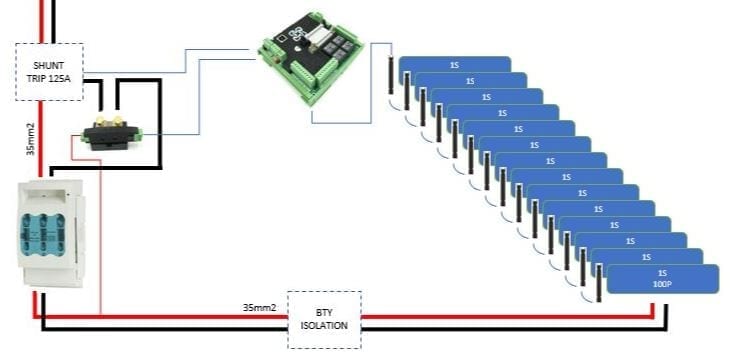 The BMS works by connecting ‘Longmons’ to each pack. These are small bits of hardware which link each pack together and provide the feedback to the Watchmon controller. The Longmons are the workers and do the balancing, monitor temps and a few other cool bits and pieces. The BMS, with the help of some relays, can also be used to trigger a shunt trip. The Shunt trip will basically cut off any use of the batteries during a fault state. For example, if the temp rises past a set parameter, the BMS can trigger the trip and all use of the batteries will be cut. This is just one of the safety features which I intend to implement.
In line with the circuit breaker, we also have some large fuse(s). These 160A HRC type fuses in a disconnect/isolator will also be used. At $12 per fuse and $50 for the holder, you can never have too much circuit protection. So not only will each of the individual batteries be fused, but the entire pack will also be covered.
So that’s it for part 2! What’s next:
- Bus Bars on packs.
- Cabinet Install
- Solar Install
- Lots of wiring up!
Want to skip Back or Forward? Check out the other parts.
Part 1 – Recycling batteries
Part 3 – Fusing and cell protection
Part 4 – Solar/Inverter Install and BMS
Hello,
thank you for your detailed description of your work!
I am really eager to read the next part!
Keep up your good work!
Greetings from Switzerland
Mike
I’m working on the busbars! once completed I’ll put up another update. Thanks for the support!
Any updates on part 3? Thinking of doing this myself, where did you research everything from?
Hi James, Sorry I have been away for 5 weeks! I have a few things in the works and will post soon hopefully! life has been getting in the way! I have been following a lot of builds over the ‘second life storage’. (Google it!)
also youtube! check out HBPowerwall and a few of those guys. Goodluck and stay tuned.
Mr. Black, what was the final cost? I am wanting to build one as well but the cost of doing it is holding me back.
Hi Craig, I purchased everything in stages. The batteries themselves were $4 per KG, the BMS was easily the most expensive part coming in around $1000. However, you don’t want to skimp on safety!
All up I think I have spent about $2K.